
Essential Retro Gaming Mods: Restoring and Modernizing Vintage Hardware
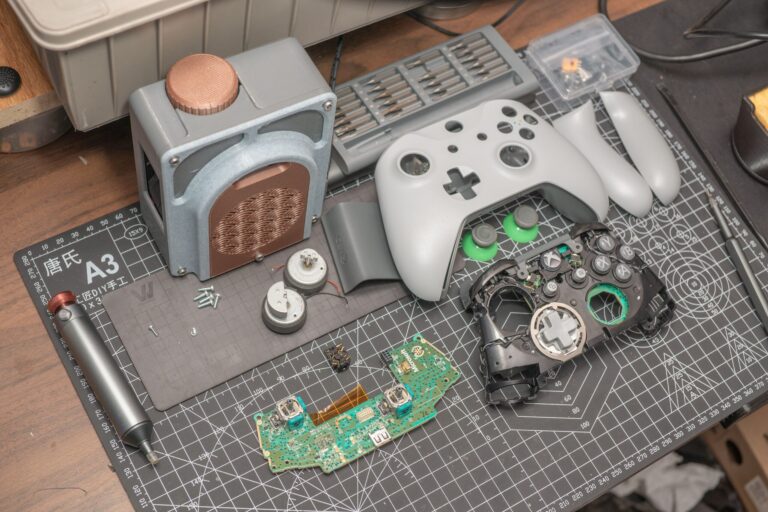
Every solid retro gaming workbench starts with triage rather than flashy upgrades. Before you solder in any video board or flash memory accessory, vintage hardware demands foundational maintenance: drying capacitors, tarnished power switches, and aging voltage regulators routinely choke decades-old circuit boards. Taking on retro gaming mods means learning how to pull tired electrolytic caps off a motherboard, scrubbing away battery acid from motherboards, and restoring clean direct-current power. A console suffering from unstable rail voltages will glitch, drop audio channels, or reset spontaneously as soon as you draw extra current with modern add-ons, making methodical hardware restoration the prerequisite for every meaningful workshop project.
Handheld restoration highlights this balance between authentic preservation and modern utility better than any home console. Dropping an aftermarket IPS kit into a Game Boy or Game Boy Color replaces the unlit, ghosting reflective LCD with a razor-sharp backlit panel featuring adjustable brightness and vivid color reproduction. Installing an IPS kit usually requires steady hands for light soldering work–typically tacking wires onto motherboard test points for brightness control–and sometimes mild plastic shell trimming to seat the larger screen bracket cleanly. Pairing that screen swap with fresh speaker capacitors transforms an unplayable, dim vintage handheld into an ergonomic everyday daily driver without gutting original processing hardware.
Taking hardware fixes seriously keeps genuine silicon alive without depending on software virtualization. Whether you are replacing worn cartridge pins on a front-loading NES, replacing fragile coin-cell save batteries with clean retention holders, or cleaning conductive silicone pads inside your gamepads, these basic repairs safeguard hardware reliability. High-end video upgrades and modern storage solutions rely entirely on steady hardware foundations, making disciplined soldering and clean board repairs your absolute highest priority on the bench.
Flash Carts and Native Play: Loading Your Library on Original Silicon
A flash cart is a purpose-built game cartridge equipped with an accessible microSD card slot, enabling genuine retro consoles to boot digital game ROMs directly off solid-state storage. Instead of wearing down brittle forty-year-old game contacts or overpaying on inflated secondhand markets, you store your legitimate software backups on a memory card and let the original hardware read the data exactly as it would from a production retail cartridge. The benchmark in this category remains the EverDrive lineup engineered by Krikzz–spanning dedicated boards like the EverDrive N8, SD, GB, 64, and MD–alongside alternative options such as the Super UFO, offering unmatched reliability and rock-solid system compatibility across multiple console generations.
Running ROMs through a dedicated flash cart delivers native silicon performance that software emulation simply cannot duplicate. Because the console’s genuine central processor and audio chips execute the software instructions directly, you retain original hardware timings, authentic button response, and zero frame-pacing micro-stutter. Modern flash carts also introduce quality-of-life perks that transform how you play tough retro titles, including in-game navigation menus, cheat engine support, and save state functionality. An instant save state captures your exact memory address and RAM state on the fly, allowing immediate practice through brutal checkpoint droughts without altering the core game cartridge ROM.
Setting up your microSD library requires basic directory hygiene and an understanding of platform dependencies. While standard 8-bit and 16-bit titles boot straight off micro-storage without fuss, specific console expansions and CD add-on environments mandate clean BIOS dumps placed in root system folders before executing code. Loading your verified library onto an authentic flash cart keeps your prized physical boxed collection safely on the display shelf while giving your everyday setup the immediate versatility of modern digital media.
Display Mastery and Upscalers: Routing 240p Signals to Modern Screens
Retro home consoles from the third generation through the early 3D era primarily output a progressive 240p video signal, a non-interlaced broadcast trick that vintage Cathode Ray Tube (CRT) televisions displayed natively with distinct scanlines and zero input lag. Modern 4K flat panels, however, expect high-definition progressive video or standard 480i interlaced broadcasts. When you plug composite yellow cables straight into a modern television, the internal processor mistakes 240p for 480i, misinterpreting progressive fields, smearing pixel edges with crude deinterlacing filters, and injecting noticeable input lag that ruins twitch platformers and precision shooters.
Mastering video routing requires intercepting that clean analog feed at the source and handling resolution scaling before the signal ever touches your flat panel. European standard 21-pin RGB SCART cables pull uncompressed video lines directly from consoles like the Super Nintendo, Sega Mega Drive, and PlayStation, eliminating the messy signal bleed and chroma noise inherent to composite wiring. Feeding that pristine SCART line into a dedicated low-latency upscaler, such as a RetroTink, digitizes and line-multiplies the 240p progressive scan into standard HDMI without adding frame-delay latency, restoring sharp, square pixels and recreating authentic scanline masks on contemporary displays.
This dedicated upscaler pipeline bridges the gap between classic living room convenience and dedicated hardware recreation. While field-programmable gate array (FPGA) setups like the Analogue Pocket or a custom MiSTer build replicate retro console chips cycle-for-cycle, routing authentic original hardware through an external video line-doubler preserves the tactile quirks of genuine cartridges and period controllers. Investing in shielded RGB SCART cables alongside an upscaler unlocks true picture clarity, ensuring classic games look razor-sharp on modern displays without sacrificing the zero-lag responsiveness the original hardware was engineered to deliver.
Handheld Overhauls: Installing Modern IPS Kits and Power Upgrades
Upgrading a vintage Game Boy or Game Boy Color begins with the display, where replacing the unlit, washed-out reflective screen completely alters the playing experience. Modern aftermarket IPS kits drop into the chassis to deliver vivid color reproduction, crisp pixel grids, and adjustable backlight levels that make retro handhelds usable in any lighting. Installing an IPS kit demands gentle patience, as you will typically solder thin wires to motherboard test pads for on-screen brightness controls and trim minor internal plastic ridges so the larger display sits completely flat.
The enhanced visual clarity of an IPS kit introduces a practical trade-off on your workbench: significantly higher current draw. Running an active backlight alongside a flash cart quickly drains traditional AA batteries and can cause voltage sag on aging power rails, leading to audio hum or sudden restarts. Swapping tired power distribution boards and integrating clean rechargeable lithium polymer battery packs with regulated USB-C charging circuits guarantees steady voltage rails and provides hours of sustained playtime without burning through disposables.
Raspberry Pi Emulation Stations: Building Low-Cost Retro Rigs
Building a dedicated emulation station around a Raspberry Pi remains the most cost-effective way to assemble a comprehensive vintage library without tracking down dozens of original consoles. Powered by versatile software suites like RetroArch running modular libretro cores, a single board computer easily emulates everything from 8-bit home systems to 32-bit disc classics through one unified interface. The initial configuration takes less than an hour: flash your operating system image onto a reliable microSD card, drop your legitimate game backups and necessary console BIOS dumps into their designated directories, and map your gamepads.
Achieving authentic look and feel on a modern display requires deliberate fine-tuning within the software settings rather than relying on out-of-the-box defaults. Activating CRT shaders simulates period-correct scanlines and aperture masks, softening raw high-resolution output into something that resembles native 240p tube rendering. Pairing the board with low-latency wired USB gamepads and dialing in run-ahead frame compensation keeps input response remarkably tight, turning an inexpensive micro-PC into an everyday living room workhorse.
Diagnostics and Console Repair: Soldering Basics, Recapping, and Maintenance
Before attempting performance modifications or installing display add-ons, routine diagnostics and fundamental component repairs must take precedence on the workbench. Vintage consoles from the third and fourth generations are notorious for leaking and dried-out electrolytic capacitors that disrupt power delivery, mute stereo sound channels, and inject static lines into video signals. Replacing these failing components–a process known as recapping–demands a temperature-controlled soldering iron, quality flux, and braided copper wick or a desoldering pump to clear through-hole vias cleanly without lifting delicate copper traces.
Thorough preventative maintenance extends beyond capacitor replacement to address decades of mechanical wear and chemical oxidation. A digital multimeter is indispensable for verifying that voltage regulators supply solid rails before powering attached accessories, while high-percentage isopropyl alcohol quickly cleans oxidized cartridge slots, tarnished power toggles, and gummy membrane contacts. Systematically scrubbing corrosion off logic boards and reflowing brittle solder joints eliminates intermittent hardware bugs, establishing a rock-solid electrical foundation that ensures your vintage gaming hardware runs reliably for years to come.