
Raspberry Pi retro gaming is the cheapest way to build a complete retro console, and in 2026 it is also one of the best. A single board the size of a credit card can run the entire 16-bit generation perfectly, play a surprising share of the PlayStation library, and connect to the same television you use for streaming. The catch is that the setup involves real choices: which board, which software image, which emulator cores, and which legal boundaries. As a developer who has spent years writing about emulation and modern displays, I will walk you through every one of those decisions with the technical details most guides skip.
Which Raspberry Pi Should You Buy for Retro Gaming?
The Raspberry Pi family now spans five generations, but only three models make sense for retro gaming. The choice comes down to how far back in the console timeline you want to go.
Raspberry Pi 5 — The Best All-Rounder
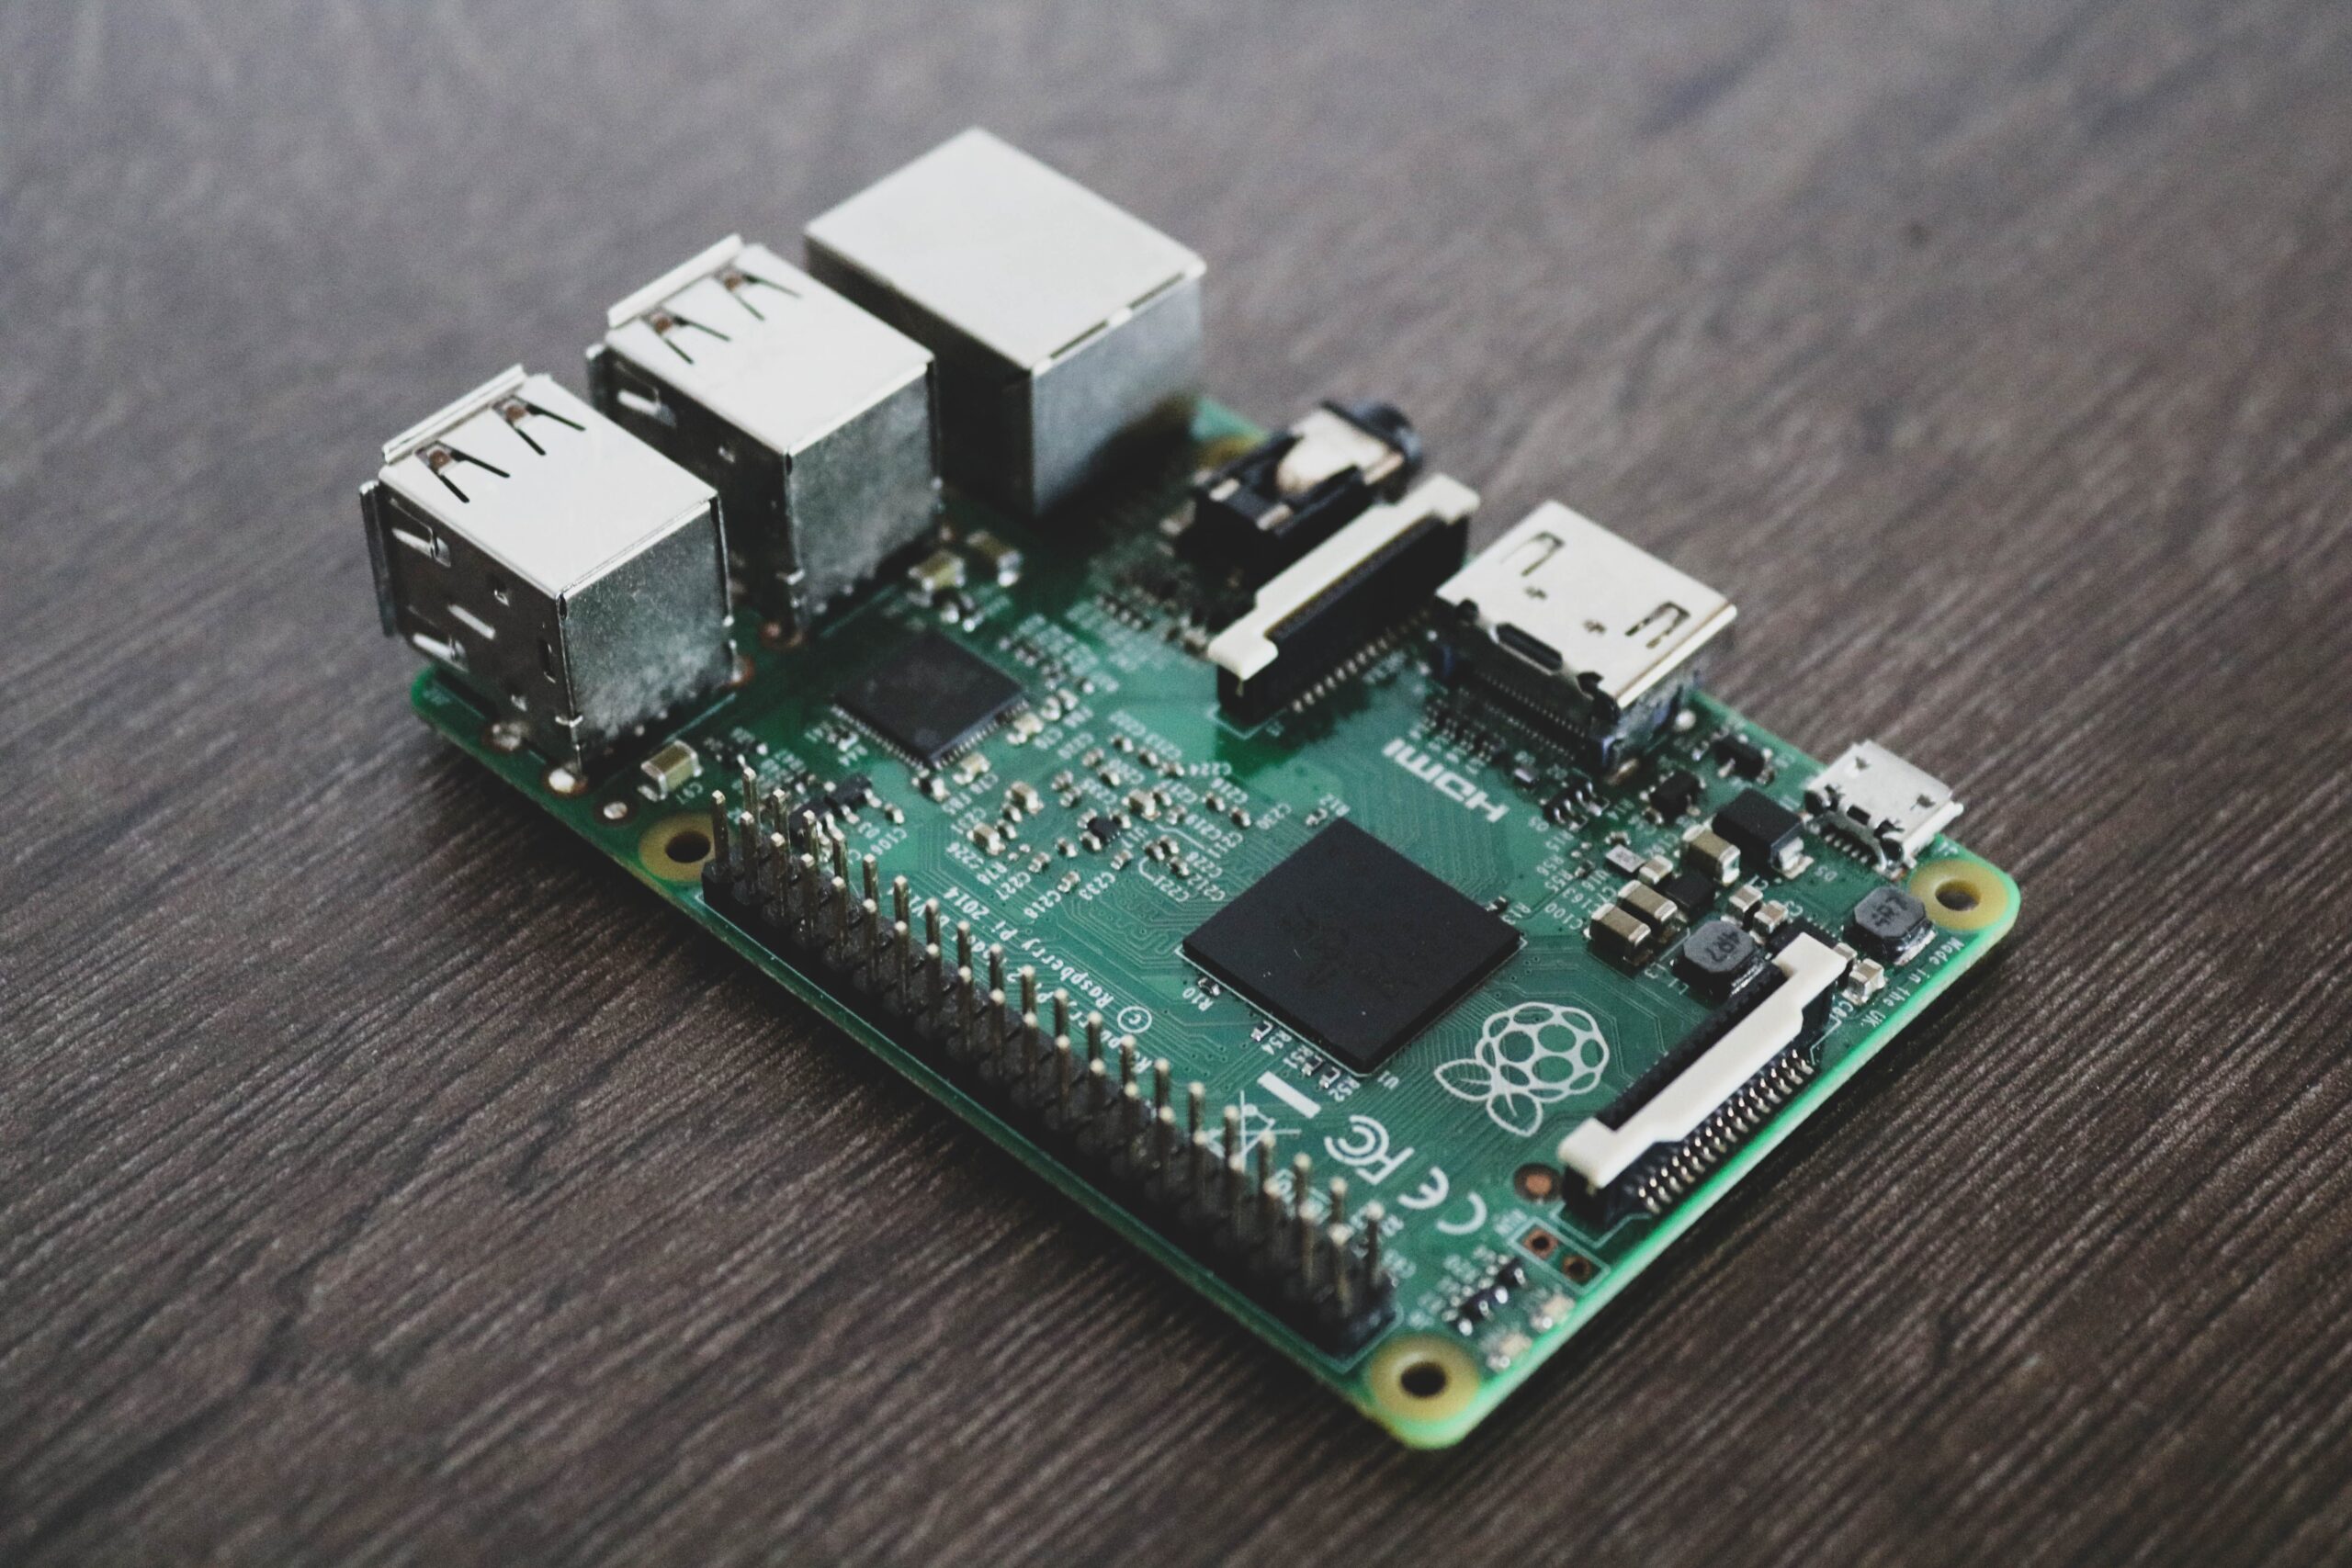
The Raspberry Pi 5 is the current flagship, with a quad-core Arm Cortex-A76 processor that roughly doubles the performance of the Pi 4. For retro gaming this means perfect PlayStation 1 emulation, smooth Dreamcast and Nintendo 64 at decent framerates, and enough headroom for shaders and bezel overlays without dropping frames. It is also the most energy-hungry Pi, so it needs a proper 5V/5A USB-C power supply and a case with active cooling. If you want one machine that plays everything up to the 32-bit era without compromises, this is the board.
Raspberry Pi 4 — The Value Sweet Spot
The Pi 4 is older but far from obsolete. It plays NES, SNES, Mega Drive, Game Boy and arcade games flawlessly, runs PlayStation 1 with a little tuning, and handles most Nintendo 64 titles at reduced resolution. It costs noticeably less than the Pi 5, runs cooler, and has an enormous library of tested tutorials. If your goal is the 16-bit generation and a taste of PS1, the Pi 4 is the honest recommendation — and it leaves money in your budget for a good controller and a quality microSD card, which matter more than the board.
Raspberry Pi Zero 2 W — The Tiny Retro Handheld
The Pi Zero 2 W is a small, affordable board with enough power for 16-bit emulation and light handhelds. It is the natural choice for building a pocket-sized retro device or a portable in a custom case, and its low power draw suits battery projects. The trade-offs are real: it struggles with PlayStation 1, runs warm under load, and wireless controllers need the extra processing headroom. For a dedicated NES or Game Boy machine, it is excellent; for a full library, buy the Pi 4 instead.
| Board | Power | Best for | PS1 | N64 |
|---|---|---|---|---|
| Raspberry Pi 5 | Highest | Everything up to PS1, plus Dreamcast | Excellent | Good |
| Raspberry Pi 4 | Medium | 16-bit era plus PS1 | Good | Playable |
| Pi Zero 2 W | Low | Portables and 8/16-bit | Struggles | No |
What You Need: The Complete Shopping List
The board is only half the build. These are the components that separate a machine that works from a machine that frustrates you every weekend.
A Quality Power Supply
Retro gaming boards are sensitive to power. A weak or counterfeit power supply causes random resets, corrupted saves and glitchy video — symptoms that look like emulator bugs but are actually voltage drops. Always buy the official power supply for your board, or a reputable brand that matches the exact voltage and current the board specifies. A Pi 5 needs 5V/5A; a Pi 4 needs 5V/3A. Do not reuse a phone charger and hope for the best.
The Right microSD Card
The operating system, the emulators and your ROM library all live on the microSD card, and its quality decides how fast the menu loads and how reliably saves are written. Use a card from a known brand — SanDisk, Samsung or Kingston — rated A1 or better for random input/output. A 64GB card holds the RetroPie system plus a large library; 128GB is comfortable for PS1 and arcade collections. Buy the card from a trusted retailer, because counterfeit cards with fake capacities are common on marketplaces. For honest sourcing advice, our guide to where to buy retro games covers how to avoid fake storage and fake carts alike.
A Case with Real Cooling
RetroPie under load makes a Pi hot, and thermal throttling shows up as stutter in exactly the games you want to play smoothly. Passive aluminium cases work well for the Pi 4 and Zero; the Pi 5 really wants active cooling with a small fan. RetroFlag cases add a power button and look like miniature consoles, which is a nice touch, but the cooling is what matters. A case that cannot shed heat will cost you framerate.
Controllers That Match the System
USB and Bluetooth controllers are broadly supported, but not all controllers are equal. The classic advice holds: a controller that resembles the original hardware is the most comfortable for the games you grew up with. For retro accuracy you cannot beat the 8BitDo range, which offers SNES, Mega Drive and NES-style pads with modern wireless reliability. If you buy a cheap generic pad, check that it maps all its buttons before you start — many budget controllers report extra buttons that confuse RetroArch’s input mapping.
A Display That Shows the Truth
The board outputs over HDMI, and how the picture looks depends as much on the display as on the emulator. A modern 4K television will happily stretch a 240p signal, so configure a proper integer scale and a CRT shader to recover the authentic look. My guide to playing retro games on a modern TV explains the cables, the upscalers and the emulation settings in detail, and the same principles apply here. The short version: pixel perfect scaling beats blurry fullscreen every time.
How to Set Up RetroPie Step by Step
RetroPie is the most popular Raspberry Pi retro gaming image, and for good reason: it is free, actively maintained, and bundles RetroArch plus a curated set of emulator cores behind a clean menu. The setup takes under an hour and breaks down into these steps.
Step 1: Flash the RetroPie Image
Download the RetroPie image for your board model from the official site, then write it to the microSD card with the Raspberry Pi Imager tool. The Imager also lets you pre-configure WiFi and enable SSH, which saves you typing on the on-screen keyboard later. Do not skip the verification step after flashing — a bad write produces bizarre, hard-to-debug errors.
Step 2: First Boot and Basic Configuration
Insert the card, connect power, and the Pi boots into the RetroPie menu. If you enabled SSH, connect from a computer; otherwise use the on-screen keyboard. The first tasks are simple: update the system, set your regional options, and configure the audio output. Use the “raspi-config” tool for the deeper settings, and do not disable the splash screen until you have confirmed boot works reliably.
Step 3: Transfer Your Game Library
Connect to the Pi over the network and copy ROM files into the matching folder for each system. RetroPie exposes its storage over Samba, so on Windows you open the Pi’s share and drop files into folders like roms/snes or roms/psx. Before copying, read the section on the legal side of emulation below — this is exactly where the boundaries matter. For arcade games, sort them into the correct subfolders for the specific emulator, and include the required BIOS files for systems like PS1 where the BIOS is mandatory.
Step 4: Configure Your Controllers
RetroPie prompts you to configure a controller on first boot. Map every button carefully, because a skipped button later produces controllers that refuse to exit games or open the menu. After the initial mapping, the RetroArch menu lets you fine-tune dead zones and button layout per system. If a game will not register a button, suspect the mapping before the emulator core.
Step 5: Install and Update Emulator Cores
The default RetroPie install includes a set of cores that cover most systems, but the package manager lets you add or update them. Updating cores fixes performance regressions and adds compatibility fixes, so run the updates regularly. Keep the cores conservative: there is no benefit to running the newest core if the version that shipped with RetroPie already runs your library flawlessly.
Step 6: Configure Video and Shaders
This is where my rule applies: making a retro game look great is a science, not a mystery. Set the emulator to integer scaling, choose a CRT shader that suits your display, and disable smoothing for 2D titles. Test each setting on a game you know intimately — a shader that looks soft on a menu can blur the action you only notice mid-game.
Step 7: Scrape Metadata and Box Art
RetroPie can download box art, descriptions and metadata for your library automatically. The scraper guesses the game from the filename, so use clean, complete file names — “Super Mario World.smc” scrapes correctly, “smw v2.smc” usually does not. A well-scraped library turns a folder of files into a console experience, and it is the difference between a hobbyist setup and a finished one.
Step 8: Test, Save, and Back Up
Play a save-heavy game for a session to confirm that save states and memory card saves persist after reboot. When everything works, back up your microSD card image to a computer. A corrupted card wipes years of saves in seconds. This is the step most people skip and everyone regrets skipping.
The Best Emulator Cores for Raspberry Pi
RetroArch uses emulator cores, and on a Raspberry Pi the choice of core often matters more than the choice of board. These are the cores that consistently perform well.
NES and Famicom — FCEUmm or Mesen
Both cores handle the NES library at full speed on every board, including the Pi Zero. FCEUmm is the classic workhorse; Mesen offers cycle-accurate accuracy and better debugging for demanding titles. For everyday play on a Pi, FCEUmm is the safe choice.
SNES — snes9x
SNES emulation is demanding, and on a Raspberry Pi the snes9x core is the reliable pick. It plays the entire library at full speed on the Pi 4 and Pi 5, including the Super FX games like Star Fox, which is the classic stress test for SNES emulators. If you want the definitive list of games to test, our ranking of the best SNES games of all time is the perfect benchmark suite.
Mega Drive and Game Boy — Genesis Plus GX
Genesis Plus GX covers the Sega Mega Drive, the Game Gear and the entire Game Boy family with a single, accurate core. It runs everything at full speed even on the Pi Zero 2 W, and its handling of the Mega Drive’s sound hardware is excellent. This is one core that you never need to second-guess.
PlayStation 1 — PCSX ReARMed
PS1 emulation is the practical limit of what a Raspberry Pi does well. The PCSX ReARMed core, specifically built for ARM devices, runs the majority of the PS1 library at full speed on the Pi 4 and Pi 5. Some 3D-heavy titles need the resolution dropped, and you must supply the PS1 BIOS file. It is not a perfect emulator, but on a Pi it is the best option available.
Arcade — FinalBurn Neo and MAME
Arcade emulation depends heavily on the ROM set. FinalBurn Neo is the better core for the Pi: it is lighter than full MAME and covers the most popular arcade boards well. Keep the ROM versions matched to the core’s expectations, because mismatched ROM sets are the number one cause of arcade games failing to launch.
Nintendo 64 — The Honest Caveat
N64 emulation is where the Raspberry Pi runs out of road. On the Pi 4 the games are playable but imperfect; the Pi 5 improves framerates considerably. If N64 is a priority, either accept the limitations, buy the fastest Pi, or use a different device. I recommend checking my comparison with the alternatives below before committing to N64 as a core requirement.
Raspberry Pi vs the Alternatives
The Raspberry Pi is not the only way to play retro games on a modern TV, so here is the honest comparison against the other common options.
vs the Mini Consoles
Nintendo’s and Sega’s official mini consoles are plug-and-play, legal and perfect for casual play, but they ship with a fixed library of around twenty to forty games. A Raspberry Pi plays thousands and runs every classic system, at the cost of setup time and a slightly less polished interface. If you want one console for the classics, the mini is simpler; if you want everything, the Pi wins. Our guide to retro consoles with built-in games covers the mini console options in depth.
vs FPGA and MiSTer
FPGA systems like MiSTer replicate the original hardware at the circuit level, giving the closest possible approximation of real console behaviour, including the timing quirks that emulators approximate. They cost several times more than a Raspberry Pi, require more technical setup, and deliver results that only a discerning eye notices on a CRT or high-end upscaler. For a purist, MiSTer is the summit; for everyone else, a Pi is the sensible climb.
vs a Used PC
A second-hand desktop computer from a few years ago is often more powerful than a Pi for the same money, and it runs the same RetroArch cores with better N64, Dreamcast and even GameCube performance. The trade-offs are size, power draw and noise. If you already own a spare PC, it is the free option; if you want a compact, silent, dedicated machine in the living room, the Pi is the better fit.
vs Retro Handhelds
Retro handhelds like the Anbernic and Retroid devices are essentially portable retro machines, many of them built around the same ARM chips that power the Pi. They trade the living-room television experience for a pocket-sized screen. The right choice depends on where you want to play: on the sofa looking at a TV, build a Pi; on the bus, buy a handheld. My buying guide for retro handhelds explains the difference in detail.
The Legal Side of Raspberry Pi Retro Gaming
This is the part that most setup guides rush past, and it matters. Running emulators on a Raspberry Pi is legal; the question is always the games. Downloading ROMs of games you do not own is copyright infringement, regardless of how easy the tooling makes it. The genuinely safe approach is to dump ROMs from cartridges and discs you actually own, which is technically straightforward and legally sound in most jurisdictions.
Do not pay attention to sellers who promise “pre-loaded” SD cards with thousands of ROMs — they are almost always distributing copyrighted material, and buying one funds exactly the kind of grey market that makes it harder to argue for preservation. My guide to emulation and ROMs explains the full legal picture, including what counts as fair use, how emulator developers stay within the law, and why dumping your own games is the cleanest route. The hobby deserves to stay legitimate, and that starts with the source of the files.
Frequently Asked Questions
Is a Raspberry Pi good for retro gaming?
Yes, for the 8-bit and 16-bit generations it is excellent, and the Pi 4 and Pi 5 handle most of the PlayStation 1 library too. The limits are the later 3D systems: Nintendo 64 is playable rather than perfect, and systems after the PS1 need a different device.
What is the best Raspberry Pi for retro gaming?
The Raspberry Pi 5 is the best all-round choice if you want headroom for PS1 and Dreamcast. The Raspberry Pi 4 is the value pick for the 16-bit era plus PS1, and the Pi Zero 2 W suits portable builds. For most people, the Pi 4 offers the best balance of price and performance.
Is RetroPie legal?
RetroPie itself is legal — it is an operating system that bundles emulators, which are legal software. What you put on it is the question. Dumping and playing ROMs from games you own is the legally sound route; downloading ROMs of games you do not own is not. The legality is in the files, not the software.
Can a Raspberry Pi emulate PlayStation 1?
Yes. The PCSX ReARMed core runs the majority of the PS1 library at full speed on the Pi 4 and Pi 5. Some 3D-heavy titles need a reduced internal resolution, and you must provide the PS1 BIOS file. It is not perfect emulation, but it is genuinely playable.
How much does a Raspberry Pi retro gaming setup cost?
A complete build with a Pi 4, case, power supply, microSD card and a decent controller lands around $80 to $120, which is less than a single modern game console game. A Pi 5 build costs a bit more, and the Pi Zero 2 W path can come in under $60. The exact list is in the shopping section above.
Conclusion: The Science of a Perfect Retro Box
A Raspberry Pi retro gaming setup is not magic, and that is precisely why it works. Choose the right board for the systems you want, buy a real power supply and a decent card, match your controllers to the hardware you remember, and configure integer scaling with a good CRT shader. Each decision is a small, technical, testable one — and together they produce a machine that runs thousands of classic games on the television you already own.
Start with the 16-bit generation, which every current board handles flawlessly, then expand toward PS1 as your confidence grows. Scrape the box art, back up the card, and remember the legal rule: dump the games you own. The Raspberry Pi retro gaming project rewards the methodical — the same people who will end up with the best-looking, most reliable retro machine in the room.